“QuickTasker” Documentation v1.0
“QuickTasker”
Thank you for downloading QuickTasker plugin. The following is a guide to help you get started. This documentation provides information on the features and usage of the plugin, divided into sections for easy navigation and understanding.
Table of Contents
- Admin areas
- Board
- Task
- Archive
- Users
- Tasks page
- Quicktasker user sessions
- Logs
- Settings
- Webhooks
- API Tokens
A) Admin areas - top
This plugin provides admin areas accessible to WordPress users who have the required permissions. In the admin areas, users can manage boards, tasks, users etc. Currently there are 7 permissions a WordPress user can have and admins have all of them by default.
quicktasker_admin_roleProvides access to admin areas.
quicktasker_admin_role_manage_usersProvides access to manage users.
quicktasker_admin_role_manage_settingsProvides access to manage settings (boards, stages, automations, webhooks).
quicktasker_admin_role_manage_archiveProvides access to archive.
quicktasker_admin_role_allow_deleteProvides access to delete resources.
quicktasker_access_user_page_appProvides access to tasks app.
quicktasker_admin_role_manage_quicktasker_sessionsProvides access to Quicktasker sessions page to manage QuickTasker type user sessions.
B) Board - top
Board is a central feature designed to help you organize and manage your tasks efficiently. Each board can have multiple stages, and each stage can contain numerous tasks. This hierarchical structure allows you to break down your projects into manageable parts and track progress effectively.

Board settings: Settings can be accessed by clicking the gear icon next to the board name. The modal that opens have the following settings and features.
- Change board name and description
- Delete the board
- Manage board wide custom fields that will be added to all board tasks
- Manage board wide settings
The board can also be viewed in task view, which is more suitable if you need to filter tasks on the board.

Stages: A board is divided into several stages, each representing a different phase of your project. For example, you might have stages like "To Do," "In Progress," and "Completed." You can customize these stages to fit your workflow and project requirements. Stage settings can be accesses by clicking stage gear icon and selecting edit stage. The following settings are provided.
- Change stage name and description
Stage actions Stage actions can be accessed by clicking the stage gear icon
- Move stage left. Shifts stage to left if possible.
- Move stage right. Shifts stage to right if possible.
- Edit stage. Opens a stage settings modal.
- Archive all stage tasks. Adds all tasks in the stage to archive.
- Delete stage. Deletes the stage. This actions is disabled when there are tasks in the stage.
C) Task - top
Task represents an individual unit of work that needs to be completed. Tasks are the building blocks of your projects, allowing you to break down complex projects into manageable pieces

Editing Tasks: You can easily edit tasks to update their details, such as the title, description. This ensures that all relevant information is up-to-date and accessible to your team.
Assigning Users: Tasks can be assigned to users, allowing you to delegate responsibilities and track who is working on what. This helps in managing workloads and ensuring accountability.
Marking Tasks as Completed: Once a task is finished, you can mark it as completed. This helps in tracking progress and ensuring that nothing is overlooked.
Custom Fields: You can add custom fields to tasks to capture additional information specific to your workflow. This flexibility allows you to tailor the task details to your project's unique requirements.
Comments and Logs: Each task supports both private and public comments. Private comments are only visible and can be written in the admin areas, making them ideal for internal team discussions or notes. Public comments can be seen and written by users in the tasks app, allowing for open communication and collaboration with all users involved in the task. Additionally, you can view logs related to the task to track changes and updates over time.
D) Archive - top
Archive page allows you to view all archived tasks. Archived tasks can be restored or deleted.
E) Users - top
This plugin supports three types of users: WordPress admins, other WordPress users, and special users called quicktaskers. WordPress admins have full access to all admin areas. Other WordPress users do not have any access by default but can be granted if needed. QuickTaskers are separate users who do not have admin access but can manage tasks through special webpage.
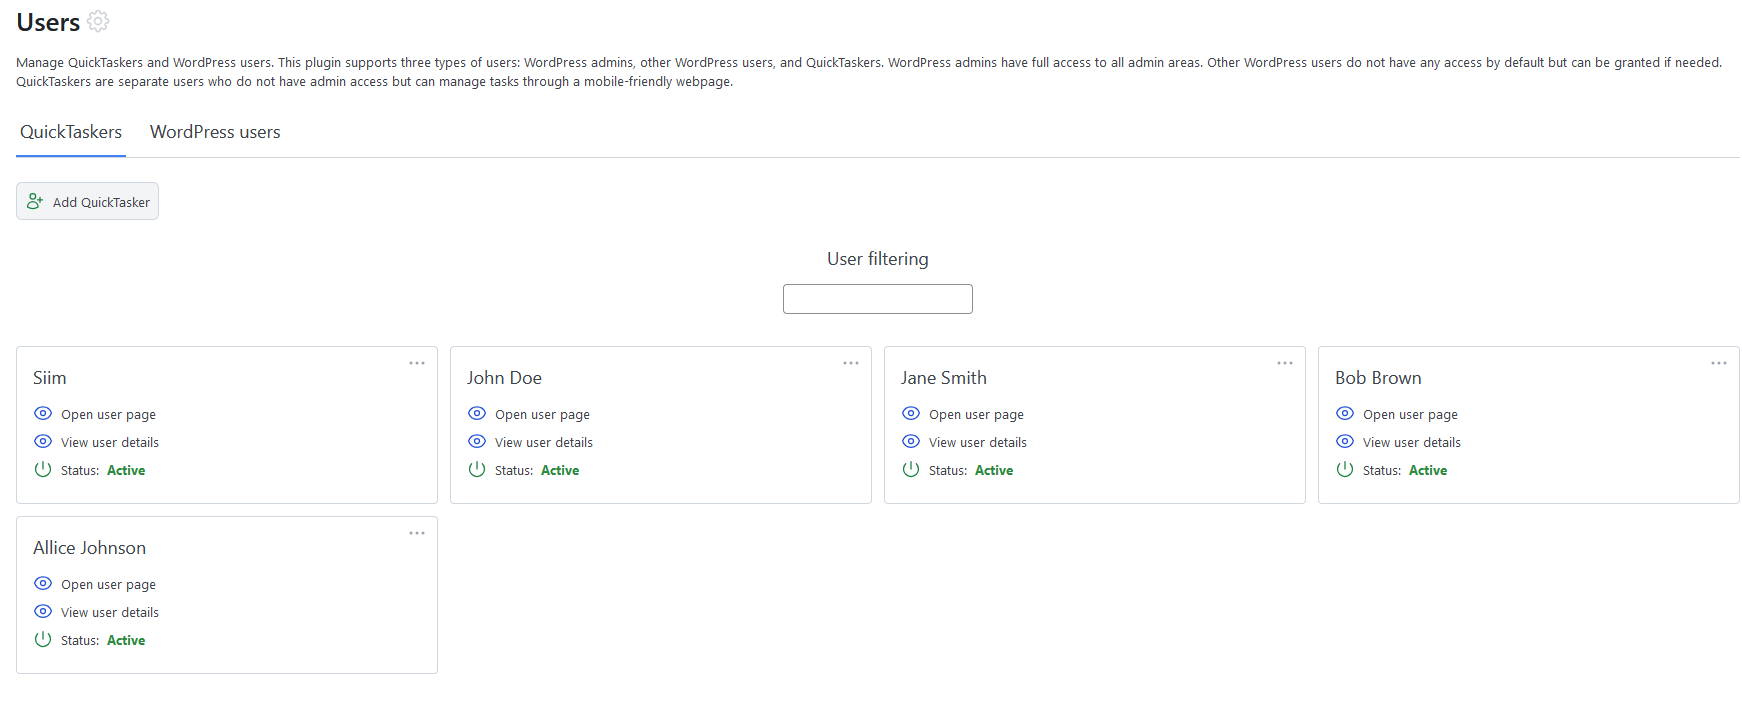
Creating QuickTasker: WordPress admins (or users with required permissions) can create new QuickTasker users, providing them with the necessary credentials to access the system. This allows for effective delegation and collaboration within your team.
Editing QuickTasker: Similar to tasks, QuickTasker details can be edited to keep information up-to-date.
Custom Fields: You can add custom fields to QuickTasker profiles to capture additional information specific to your workflow. This flexibility allows you to tailor user profiles to meet your project's unique requirements.
Comments and Logs: Each QuickTasker profile supports both private and public comments, enabling team members to communicate and collaborate effectively. Additionally, you can view logs related to the user to track changes and updates over time.
WordPress users: Ability to add or remove different permissions.
F) Tasks app - top
Each QuickTasker and WordPress user can have access to tasks app. On this app, users can manage their tasks and collaborate with their team effectively.
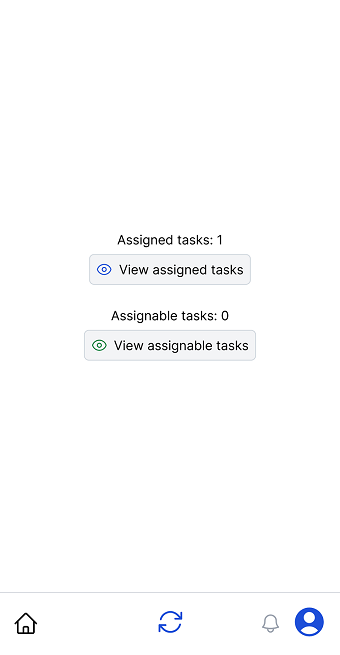
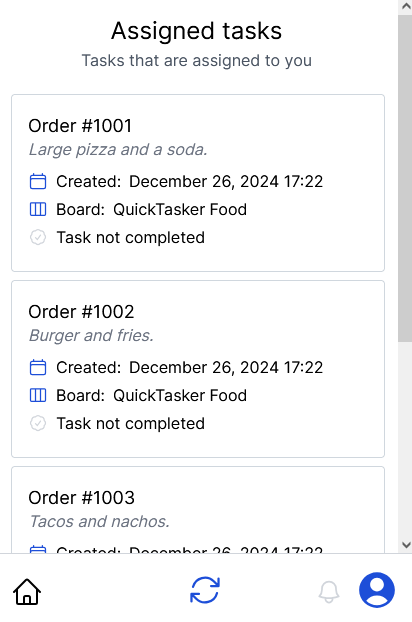
Assigned Tasks: Users can view all the tasks they are currently assigned to. This helps them keep track of their responsibilities and ensures that they stay on top of their work.
Assignable Tasks: In addition to their assigned tasks, users can also see tasks that are available for them to take on. This allows for flexibility and helps in distributing the workload evenly among team members.
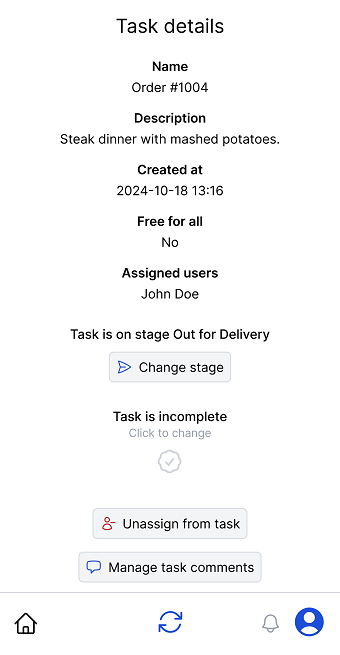
Task Details: Users can click on task to view its details. This includes information such as the task title, description, task stage, and any associated custom fields. Having all the relevant information in one place makes it easier for users to understand and complete their tasks.
Comments: Users can add comments to tasks directly from their user page, enabling effective communication and collaboration within the team. Comments can be used to ask questions, provide updates, or share important information related to the task.
G) Quicktasker user sessions - top
User sessions page allows you to manage and track quicktaskers logins to user page. By default user session lasts one day.
H) Logs - top
Logs page allows to view all logs generated by this plugin
I) Settings - top
Settings page provides useful options to configure and customize the QuickTasker plugin according to your needs.
- Custom styles: Allows to add custom CSS rules to user page.
- Board automations: Feature to automate various tasks.

Board automation creator
I) Webhooks - top
Webhooks allow you to notify external services when certain events occur in the plugin. This enables integration with other tools and platforms.
- Webhooks creator Allows to create new webhooks.

Webhooks creator
Target type: The plugin object that initiates the webhook trigger.
Target action: The specific event on the object that activates the webhook.
Webhook confirm: Wait for the webhook response. Great for debugging but can slow down the process significantly.
Webhook URL: URL to the external service that will receive the webhook notification.
Request methods: When creating a resource the POST request will be used. When updating a resource the PATCH request will be used. When deleting a resource the DELETE request will be used.
- Webhooks manager Allows to manage existing webhooks.

Webhooks manager
J) API Tokens - top
The API Tokens page enables you to create and manage API tokens for programmatic access to your board's features. Each token can be configured with specific permissions to control access to different parts of your board, such as retrieving data, creating tasks, or modifying stages.
Creating API Tokens: To create a new API token, navigate to the API Tokens page and click the "Create API Token" button. You'll need to provide the following information:
- Token Name: A descriptive name to identify the token (required).
- Description: An optional description to provide context about the token's purpose.
- Permissions: Select which operations the token is allowed to perform.
Token Permissions: Each token can be granted specific permissions to control what actions it can perform. Available permissions include:
- Board Permissions:
- GET board: Retrieve board information
- PATCH board: Update board name and description
- Stage Permissions:
- GET stages: Retrieve all stages in the board
- POST stages: Create new stages
- PATCH stages: Update existing stages
- DELETE stages: Delete stages (only if they contain no tasks)
- Task Permissions:
- GET tasks: Retrieve all tasks in the board
- POST tasks: Create new tasks
- PATCH tasks: Update existing tasks
- DELETE tasks: Delete tasks
Using API Tokens: Once created, the token will be displayed only once. Copy and store it securely, as you won't be able to view it again. To authenticate API requests, include the token in the Authorization header:
Authorization: Bearer YOUR_TOKEN_HERE
API Endpoints: The following REST API endpoints are available for token-based access:
- Board Endpoints:
GET /wp-json/wpqt/v1/token/board- Retrieve board informationPATCH /wp-json/wpqt/v1/token/board- Update board name and/or description
- Stage Endpoints:
GET /wp-json/wpqt/v1/token/board/stages- Retrieve all stagesPOST /wp-json/wpqt/v1/token/board/stages- Create a new stage (requires: name, optional: description)PATCH /wp-json/wpqt/v1/token/board/stages/{stage_id}- Update a stage (optional: name, description)DELETE /wp-json/wpqt/v1/token/board/stages/{stage_id}- Delete a stage (fails if stage has tasks)
- Task Endpoints:
GET /wp-json/wpqt/v1/token/board/tasks- Retrieve all non-archived tasksPOST /wp-json/wpqt/v1/token/board/tasks- Create a new task (requires: name, stage_id, optional: description, task_focus_color)PATCH /wp-json/wpqt/v1/token/board/tasks/{task_id}- Update a task (optional: name, description, task_focus_color, due_date)PATCH /wp-json/wpqt/v1/token/board/tasks/{task_id}/order- Update task order/position (requires: task_order, optional: stage_id to move task to different stage)DELETE /wp-json/wpqt/v1/token/board/tasks/{task_id}- Delete a task
Token Format: Each token is automatically prefixed with the board's ID for easy identification (e.g., 123-abc123def456...). This helps you quickly identify which board a token belongs to when managing multiple tokens.
Security Considerations:
- Tokens are hashed and stored securely in the database
- Each token is scoped to a specific board and cannot access other boards
- Tokens only have the permissions explicitly granted during creation
- If a token is compromised, delete it immediately from the API Tokens page
Response Format: All API responses follow a consistent format:
{
  "success": true,
  "data": {
    // Response data here
  }
}
Error responses include an error message:
{
  "success": false,
  "data": {
    "message": "Error description"
  }
}
HTTP Status Codes:
- 200 OK: Request successful, data returned
- 201 Created: Resource created successfully
- 401 Unauthorized: Invalid or missing token
- 403 Forbidden: Token lacks required permissions
- 404 Not Found: Resource not found or doesn't belong to token's board
- 409 Conflict: Cannot complete action due to conflict (e.g., deleting stage with tasks)
Managing Tokens: You can view all created tokens on the API Tokens page. Each token displays its name, description, creation date, and assigned permissions. To revoke access, simply delete the token from this page.